Understanding Netsuite's Advanced PDF/HTML Template
Hello Reader,
we just completed a post of Digital Signature (you can read here) .
Please Note: To use advanced PDF, you have to enable advanced pdf. Please go to Setup > Company > Setup Tasks > Enable Features. Under SuiteBuilder, check Advanced PDF/ HTML Template checkbox field and save.
Netsuite has default standard document generator, in most cases it works fine but if you want to design
pdf as per your need , Advanced PDF/HTML template is for you.
Netsuite Developers are parsing XML using nlapiStringToXML (Suite Script 1.0) and N/xml Module
(Suite Script 2.0) .Now Netsuite provides power to Admins/Functional to design and apply logic themself.
They don't need developer in most cases.
Netsuite uses Big Faceless Organization or BFO to enable PDF file generation driven by FreeMarker template engine.
Advanced PDF/HTML in General
This template technology uses XML, HTML, CSS, nd BFO tags to create beautiful PDFs. A person with basic knowledge of these can create Advanced PDF easily.
Header Footer and Body
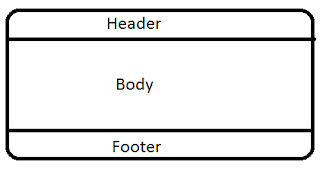
This template technology has 3 parts:
1. Header : Any information mentioned under Header show up on TOP part of pdf generated using Advanced PDFs. Usually Company's logo/Name , Invoice Number/Document Number , Date , Page Number etc comes under Header.
2. Body: This tag include most of the information. User can design this part to include table, lines, body fields as well as line fields.
3. Footer : This tag usually include information related banking info or page number or disclaimer etc.
Please Note: More space for Header and Footer means less space for Body, so utilize space properly for Header and Footer.
Please refer Sample XML here
In Detail:
Although it is good if user use standard Advanced PDF/HTML Template and click on customize button and save.Use newly saved Advanced PDF and add tags as needed.
First line of XML should be
<?xml version="1.0"?>
<!DOCTYPE pdf PUBLIC "-//big.faceless.org//report" "report-1.1.dtd">
PDF Tag: header, footer and body everything should be inside <pdf> tag.
Advanced PDF XML Structure:
<?xml version="1.0"?>
<!DOCTYPE pdf PUBLIC "-//big.faceless.org//report" "report-1.1.dtd">
<pdf>
<head>
<macrolist>
<!-- use this tag to use multiple macro -->
<macro id="nlheader">
<!-- this is used for header, id is important here and id is also mentioned inside body tag -->
</macro>
<macro id="nlfooter">
<!-- this is used for foot, id is important here and id is also mentioned inside body tag -->
</macro>
</macrolist>
<style>
<!-- add css tags here -->
</style>
</head>
<body header="nlheader" header-height="8%" footer="nlfooter" footer-height="20pt">
<!-- This is body, use this tag to put all tables, lists , images etc in this tag -->
</body>
</pdf>
** You can assign different Advanced PDF for different Custom Forms using " Custom Transaction Form ", easiest way to open " Custom Transaction Form " is to click on customize link on Top Right after "List" and "Search". Click on "Advanced" option for " Printing Type " and select print pdf and email pdf.
Changing id for Advanced PDF/HTML Template:
To change ID of Advanced PDF, click on change id button and update with id of your choice, id always start with "custtmpl" for advanced template.
Possible errors while saving Advanced PDF:
When you create advanced pdf, Netsuite create actually generate virtual record and try to mimic process, so if you use any formula like substring etc, it is advisable validate first. Example : if you use substring with params , always check length of string. If you want to use some fields in formula , always add logic (if condition) to check values first.
Edit Source Code :
You can click on customize button on standard advanced pdf and create custom pdf but to add more changes clickn on source code button icon. This will switch window from format to code, you might see popup like "Be aware that the template editor may not function properly if you switch back to WYSIWYG mode after edits have occurred in source code mode." click yes to continue.
This uses XML format, very similar to HTML , markup languages and BFO APIs.
You can add barcodes , Netsuite data for fields, sublist etc also.
<barcode codetype="qrcode" showtext="true" height="150" width="150" value="https://netsuiteguru.blogspot.com/" />
To refer field use : ${record.fieldId} example: ${record.trandate}
To refer Label of field use : ${record.fieldId@label}
To refer Sublist use :
<#list record.item as item>
${item_index} ${item.rate@label} ${item.rate} --- ${item.amount}
</#list>
This will print sublist like this : 0 Rate 11 --- $22 for first line and so on.
Use Checkbox in Advanced PDF:
You can even use checkbox and write logic on checkbox field
<#if record.custbody_mycheckbox == true><b>this is true.</b></#if>
Use Today's Date in Advanced PDF:
${.now}
for date: ${.now?date}
for time: ${.now?time}
You can use freemarker language to get values from field and join records.
Please use this link to understand bfo tags and use it in advanced pdf.
Hope this will help you, please let us know in comment section.
Don't forget to share , link and ask your query on any of our social media platform.
Thanks
Netsuite Guru
Download Netsuite Guru Android App
Follow Me on Linkedin
Our FB Page

Comments
Post a Comment
Thanks for you message, please join us on Facebook and Linkedin